
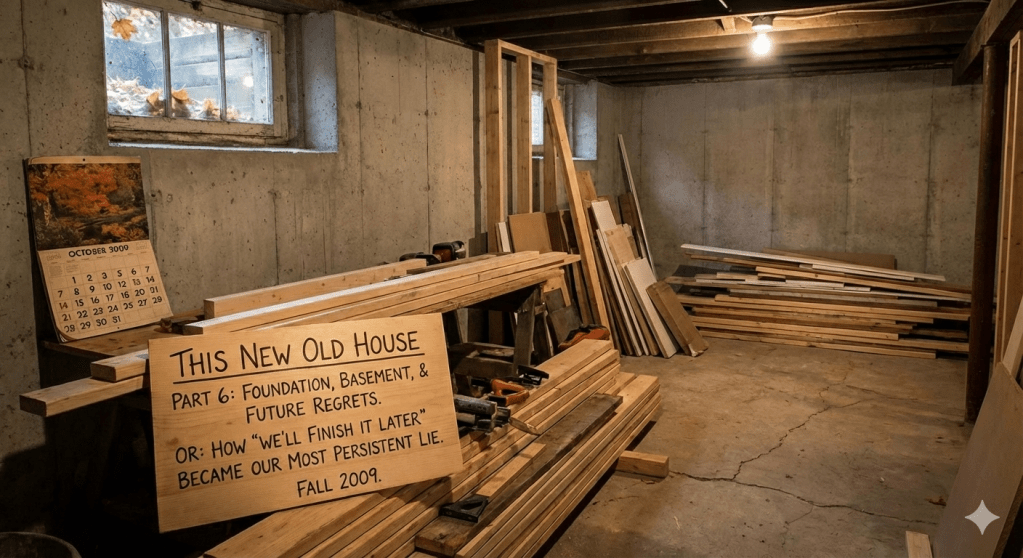
Or: How “We’ll Finish It Later” Became Our Most Persistent Lie
Fall 2009
With septic and well in place, it was time to dig a hole and pour concrete. The foundation is literally the base of everything, so naturally this was where we’d make some decisions that would haunt us for years.
Jennifer had specific requirements: minimal foundation showing above grade for aesthetics. The house should look like it had settled into the landscape, not like it was sitting on top of it.
I had specific requirements: free basement space that we could finish someday.
We got neither quite right.
The Basement Height Question
Our foundation contractor asked a simple question: “What height do you want the basement walls?”
“What are the options?” I asked.
“Standard is about 7’8″. You could go 9 feet, 10, even higher if you want.”
I looked at Jennifer. She shrugged. “I hate basements. I don’t care.”
This is important context: Jennifer wanted nothing to do with the basement. She grew up in the city. Basements were dark, depressing spaces to be avoided. She had zero interest in ever “finishing” it.
I, on the other hand, was thinking about the future. Space is valuable. The basement doesn’t count toward taxable square footage in our area. If we ever needed more room…
We went with standard. 8′ actually (7’8″ with the thickness of the floor).
What we should have done: Gone with 9 or 10 feet. Even if Jennifer didn’t care about the basement, I was the one thinking we might need to finish it someday. The extra height would have made it feel less like a basement.
What we actually did: Went with the cheapest option because Jennifer didn’t care and we were trying to be frugal on things we thought didn’t matter.
Current reality: 7’8″ basement walls. After you account for floor insulation, mechanicals, and anything hanging from the joists, the finished ceiling height would be less than 7 feet under the beam. Possibly less. It’s a basement basement.
Lesson learned: When one spouse doesn’t care about something and the other one is thinking long-term, don’t default to the cheap option. Pay for the one who’s actually thinking about it.
The Beam Decision: Kit vs. Steel
The Connor Homes kit came with a wooden main support beam—a big, engineered lumber beam that would run the length of the house supporting the floor joists. This beam would sit on posts.
The question was: what kind of posts?
The kit included specs for the wooden beam to sit on steel and concrete posts, spaced every 8 feet or so. The alternative was to scrap the kit beam entirely and go with a steel I-beam, which could span much longer distances with fewer supports.
“Steel beam costs more,” the foundation contractor said, “but you get way more open space in the basement. The wooden beam needs posts every 8 feet.”
I looked at the numbers. Steel was significantly more expensive.
Jennifer preferred it to sit on a wooden beam the way houses traditionally did and she hated basements. She was never going to use this space. But I was thinking: if we ever finish this, those posts every 8 feet are going to divide the space in annoying ways.
“How much more for steel?” I asked.
He told me. We couldn’t afford it. Not with all the other decisions we were making where we were already over budget.
“We’ll go with the kit beam,” I said. “On the posts.”
Current reality: We have a wooden beam running the length of the basement, supported by steel and concrete posts every 8 feet. The posts aren’t huge, but they’re there. They divide the space. They’re exactly where you don’t want them if you’re trying to create open rooms.
If we’d gone with a steel I-beam, the basement would be wide open. One beam, minimal supports, flexibility to arrange the space however we wanted.
What we should have done: Spent the extra $2,000-3,000 on a steel beam. Even though Jennifer didn’t care about the basement, I was the one thinking we might use it someday. And if we ever do finish it, those posts are going to be in the way.
What we actually did: Saved money on something we thought didn’t matter because we were being frugal on an overly ambitious kit house project. We didn’t know what would matter later. That’s the whole point—we didn’t know.
Windows: Basic
“What kind of basement windows do you want?” the contractor asked.
“I don’t care, the smallest?” she said.
“What’s the option that meets code?”
He smiled the smile of someone who knew I’d regret this. “I can get you basic windows that meet code requirements.”
We went with basic.
Current status: Our basement windows meet code.
What we should have done: Made carveouts for larger windows for egress and light. Bilco makes these window wells so you can have larger windows under grade.
Waterproofing: We Actually Got This Right
This is a critical step. Our concrete contractor’s coating machine was broken so we asked our main contractor to seal the foundation the old school way.
Before backfilling, the foundation was coated with proper waterproofing membrane. This is critical because once they backfill, you can never access the exterior walls again without excavation.
Good drainage is key:
- Proper footing drains using thick-walled sewer pipe (not cheap corrugated drain pipe that collapses under soil weight)
- Hydraulic cement sealing all utility penetrations
- Asphalt seal on top of that
- Everything sloped away from the foundation
Fifteen years later: Dry basement. Not a drop of water except for the utility entry point and the clogged sewer line. Money well spent.
Waterproofing is invisible but essential. This is not where you save money.
The Bilco Door Decision
“Should we add a bilco door for exterior basement access or just grade for basement access?” I asked Jennifer.
“We are not going to use the basement, so bilco it was.”
Current status: We have a bilco door. It provides exterior basement access. We use it occasionally to move large items. The basement is now partially finished. Would have been nice to have a ground level exit and entrance with the steel beam and larger ceiling heights.
Verdict: Bilco is actually super useful. Would do again but add another entrance/exit.
Utility Penetrations: The Leak Points We Got
Every place a pipe, wire, or cable enters the foundation is a potential leak point. Our contractor ran utilities underground and had them enter the foundation about halfway down the wall, maybe lower.
It was not fine.
What actually happened: The penetration points where the utilities entered—halfway down the foundation wall or lower—started leaking. We didn’t notice for some time because it was behind finished walls. By the time we discovered it, we had significant mildew growth.
I had to chip out around all the wire and pipe penetrations and pack hydraulic cement in there myself to properly seal them. That’s worked. But it never should have been necessary.
What should have happened: Utilities should enter as high up on the foundation wall as possible, ideally above grade entirely. When they enter below grade and halfway down the wall, water will eventually find its way in. It’s not if, it’s when.
Lesson learned the hard way: Above grade utility entry isn’t just easier for future work—it prevents water infiltration.
The fix: After discovering the mildew, I chipped out around every penetration point, properly packed hydraulic cement, and added foundation seal. It’s held for years now. But we shouldn’t have had to do emergency repairs on a brand new foundation.
Rule we learned: Anything that CAN come in above grade absolutely SHOULD come in above grade. Underground utility entry = eventual leak. Don’t let contractors convince you otherwise just because it’s easier for them.
The Ceiling Height Reality
After the foundation was poured and framed, we stood in the basement looking up at the floor joists.
8-foot ceilings in a basement feel like basement ceilings. 9-foot finished ceilings would have felt more like real rooms.
The decision we should have made: 10-foot basement walls, giving us 9-foot finished ceilings. The extra $2,000 would have been worth it.
Access Panels: A Necessity
Access panels need to be installed in closets for the radiant heat zones. Jennifer was not a fan of that and ideally they would have been more polished but you don’t really ever see them so it was not a big deal. What I would have preferred though when we drywalled the attic was add large access panels/doors to where the equipment was/is so we would not have to cut holes if we needed to access the HVAC. There was a small panel left for HVAC maintenance but it was not large enough for serious repairs which will happen as well as equipment replacement which will happen anywhere from 5 to 15 years. Yes 5 years.
Current status: Most time something needs maintenance, it’s in a place with no access panel. So now if it’s not in a main living space I make an access panel.
Lesson learned: Install larger access panels around HVAC than just so you can peek in. Big enough so you can get the equipment in and out when it needs to be replaced. Makes maintenance easier as well. Future you will thank present you.
The Ceiling Debate: Access vs. Aesthetics
Years later, when we were thinking about actually doing some basement work, I obsessed over the ceiling question.
“I don’t want to drywall this ceiling,” I said to Jennifer. “We have radiant heat lines, plumbing, electrical—if we cover it all up and something breaks, we’ll have to cut through drywall every time. Let’s figure out a drop ceiling that actually looks good.”
Jennifer looked at me. “If we’re going to partially finish the basement, it needs to look clean. I don’t want to lose ceiling height for just in case.”
“But access—” fell on deaf ears.
This is the fundamental difference in how we approached the house:
- **Me:** How will we fix it when it breaks? How do we access things? What’s the practical solution?
- **Jennifer:** How will it look? What’s the design solution?
I tried to come up with alternatives. I researched faux drop ceilings made with wood sheets and 1x4s. I looked at decorative exposed joist treatments. I sketched out elaborate access panel schemes.
My friend/builder looked at all my plans and said, “This is way too complicated. Just drywall it. If something breaks, we cut a hole and patch it. That’s what everyone does.”
I had photos from before the insulation went in so I would have to fall back on those as a reference if we needed to find something. So yes, we drywalled the ceiling to my dismay.
Current status: Drywalled basement ceiling. We had to cut holes in it when we had to replace our AC and put in a heat pump and they had to run new lines.
Jennifer’s perspective: “If we’d left it open, I’d never go down there. At least now it looks like it could be finished space someday.”
My perspective: “I was right about needing access, I was just wrong about how to achieve it while making Jennifer happy.”
Lesson learned: When you obsess about function and your spouse obsesses about form, you need a solution that addresses both. We ended up with form (drywalled ceiling) but inadequate function (no access). We should have done a styled ceiling with access.
What We Got Right
- Waterproofing (saved us from major water damage)
- Proper drainage (basement stays mostly dry)
- Bilco door (actually useful)
- Letting the concrete cure properly (no cracks)
- Thick-walled sewer pipe for drains (didn’t collapse)
- Eventually fixing the utility penetrations properly (after we discovered the problem)
What We Got Wrong
- 7’8″ walls instead of 9 or 10 feet (I wanted the option, didn’t pay for it)
- Kit wooden beam on posts instead of steel beam (posts every 8 feet divide the space)
- Cheap windows instead of good ones (will need replacement if we ever finish it)
- Not enough access panels (I obsessed about access, installed inadequate panels)
- Drywalling the ceiling (I wanted alternatives, Jennifer wanted it to look good, we compromised poorly)
- Believing we might finish it (Jennifer knew better)
- Letting contractor run utilities in too low (led to leaks and mildew)
- Being frugal on things we thought didn’t matter (we didn’t know what would matter)
The central lesson: We were doing an ambitious kit house project. We were trying to save money where we thought it wasn’t important. The problem is we didn’t know. That’s the whole point. We didn’t know which decisions would haunt us and which wouldn’t matter at all.
The “We’ll Finish It Later” Lie
Fifteen years in, the basement remains unfinished. It’s clean. It’s dry. It’s full of storage and mechanicals.
Jennifer has zero interest in finishing it. She hated basements from day one. She still hates basements.
I occasionally think about finishing it.
“We should really finish the basement,” I say every few years.
“You should finish the basement,” Jennifer corrects. “I never wanted to use it.”
“But think of the extra space—”
“I don’t want to spend time in the basement. You finish it if you want.”
Then I calculate the cost and effort required and decide it’s not worth it right now.
The problem is I designed it ASSUMING we might finish it. Jennifer designed it assuming we never would. If I’d accepted her perspective from the start, we might have made different choices. Or not. Because even knowing we’d never finish it, I still wanted the option.
So it sits. Unfinished. A monument to my optimism and Jennifer’s practical understanding that basements are basements, no matter how nice you make them.
Jennifer’s take: “I told you I’d never use it.”
My take: “But what if we need to someday?”
Reality: She was right. We haven’t needed to. We won’t.
__________________________________________________
Next up: Part 7 – Framing and the Friend Who “Can Do That”
(In which the Connor Homes kit arrives, my friend starts building without reading instructions, and we learn that “I’ve built houses before” doesn’t mean “I’ll build YOUR house correctly”)
__________________________________________________
Quick Takeaways
Foundation Essentials:
✅ DO THIS:
- 10-foot basement walls minimum (11 if you have dreams)
- Steel beams instead of wood posts
- Large egress windows with insulated PVC frames
- Waterproof the exterior thoroughly before backfill
- Use thick-walled sewer pipe for foundation drains
- Seal all penetrations (hydraulic cement + foundation seal)
- Bring utilities in above grade when possible
- Install bilco door if you might finish basement
- Plan 3x more access panels than you think you need
- Leave ceiling open or plan extensive access
- Let concrete cure properly
❌ AVOID THIS:
- Cheaping out on window quality
- Wood posts if you can afford steel
- Thinking “we’ll finish it later” means you’ll actually do it
- Insufficient ceiling height (regret forever)
- Drywalling over everything with no access
- Underground utility penetrations (WILL LEAK)
- Letting utilities enter halfway down foundation wall (WILL LEAK)
- Trusting contractor’s “we’ll seal it properly” promises
- Cheap corrugated drain pipe (collapses)
- Skimping on waterproofing
- Trusting “just cut the drywall when needed”
Budget Reality:
- 9-foot walls: baseline
- 10-foot walls: +$1,500-2,500 (worth it)
- Steel beams vs. wood: +$2,000-3,000 (WORTH IT)
- Proper windows: +$1,500-2,500 (worth it)
- Waterproofing: $2,000-4,000 (essential)
- Bilco door: $1,200-2,000 (useful)
- Access panels: $50-150 each (install many)
What Actually Matters:
The exterior waterproofing and drainage work. These things work, and we never think about them (except when it rains heavily and we’re grateful).
The utility penetration leaks mattered a lot—mildew is no joke. But we fixed it, and now it’s fine.
The ceiling height, the wood posts, the cheap windows? We think about those constantly. They annoy us every time we’re in the basement.
What We’d Do Differently:
- 9 or 10-foot walls (even if Jennifer didn’t care, I was the one thinking about it)
- Steel beam instead of kit wooden beam (worth the extra $2,000-3,000)
- Good windows from day one (cheap now, expensive later)
- Drywall ceiling with 3x more access panels (compromise between my function obsession and Jennifer’s aesthetics)
- Above-grade utility entry (listen when Jennifer says something, even about things she doesn’t care about)
- Accept that when one person doesn’t care and the other is thinking long-term, pay for the long-term option
- Understand that “we didn’t know” is valid but not an excuse to cheap out
Our Grade: C+
The important stuff works (dry basement after we fixed the utilities). The livability stuff is compromised by budget decisions we can’t undo. The foundation is solid. Our choices less so.
Final Thought:
Jennifer was right that we’d never finish it. I was right that we should have built it as if we might. The compromise—designing for finishing while budgeting for not-finishing—got us the worst of both worlds. At least it’s dry. Well, after I fixed the utility penetrations myself.

Leave a comment