
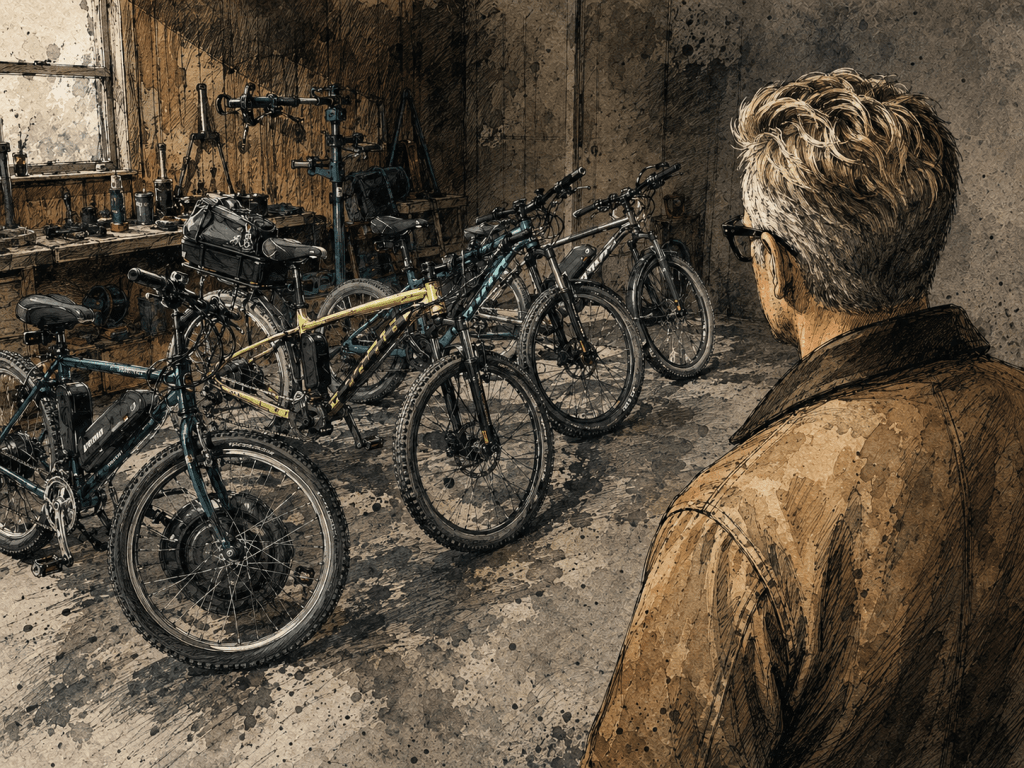
The whole thing started because my kids hate riding bikes. Every ride turned into a negotiation, and the negotiation always lost to the hills. So I did what any reasonable person does when their children won’t cooperate with an outdoor activity: I asked an AI what to do, and the AI and I landed on electrifying the bikes. Pedal assist flattens the hills, the kids stop complaining, everybody rides. That was the theory. What follows is four conversions’ worth of evidence that the theory was sound and the execution was mine.
For the record, I am not a bike guy. I don’t keep cone wrenches in a drawer. I had to buy tools I’d never heard of just to take the wheels apart, and then I had to learn what those tools were for, usually after I’d already done the thing they were meant to prevent. If you actually know how to work on bicycles, most of what’s below will read like a man describing how he kept slamming his own fingers in a door. Fair enough.
The kits are Varstrom 48V 500W Bafang rear-hub complete conversion kits — the rear wheel is the motor, the battery mounts to the frame, and a controller box runs the whole show. Four bikes got the treatment: a ’90s Bianchi Peregrine (26″), a 2019 Kona Mountain Fire (27.5″), a 2020 Kona La’nai (27.5″), and a 2025 Specialized RockHopper Base (29″). One kit, in principle. Four completely different problems, in practice.
The Bianchi, where I learned everything the hard way
I started with the Bianchi because it’s an old-school upright diamond frame with plenty of triangle to work with, and because it was Elias’s bike — he’d outgrown his BMX-style one, and he’s the one who complains the most, so electrifying his ride first felt like good triage. The parts arrived in dribs and drabs. No real instructions; the one video Varstrom points you to blows through the steps for a kit that isn’t quite the kit you got. So I did it by feel, which meant taking the rear wheel apart and putting it back together maybe three times before it was right.
The two things that got me: I didn’t space the rear wheel properly the first time, so it sat off-center, and adding a hub motor changes the chain line and the spacing enough that the derailleur and the chain start arguing with each other. V-brake to V-brake, so limited wiggle room. Then there’s the wiring, which is its own personality — some cables are too long, some are too short, and you end up with a nest of slack zip-tied wherever it’ll fit. The brake sensors with the little magnets are finicky and take patience to align. And the battery mount they include is two small screws holding up a heavy 16-amp battery, which is a recipe I didn’t trust, so I went looking for a stronger bracket to bolt and zip-tie on.
One wiring gotcha cost me real time. The rear brake-light plug is red-and-black, and on this first bike I plugged them backwards — there are no instructions, and I wasn’t thinking about the brake-light circuit at all. The tell was that the headlight fired every time I squeezed the brake. Fixing it meant prying open the controller box, which is emphatically not designed to come apart, swapping the two plugs, and putting the whole thing back together. Red and black, matched up the right way. Learn from me.
But I got it working. The Bianchi rode. And that’s the moment Jennifer said, “Maybe we should do all of our bikes,” and I, a man who had just learned what a bottom bracket tool was, said sure — and decided I’d film the next ones to help out other beginners. Reader, I did not help out other beginners.
The Mountain Fire, which forced my hand
The plan was to do my old Kona next so Henry could ride it, spread the kits out over time instead of buying three at once. I figured I’d breeze through it now that I’d done one. I set up the camera, started a time-lapse, talked to the lens like a guy who knew things.
The Mountain Fire is a completely different animal. The frame opening isn’t big enough to slide in the battery and the controller. Not even close. So now I’ve got a motor installed on a bike that can’t carry its own power, and I have to make a decision on the spot. Luckily I had the large-frame RockHopper sitting there with room to spare, so the answer became: keep moving, buy a kit for the RockHopper, and do both bikes at once. Which is how a staggered, sensible, one-bike-at-a-time rollout turned into me elbow-deep in two teardowns simultaneously, narrating a video that had become a running joke — me stopping every few minutes to say, essentially, “this is nothing like the last one.”
The Mountain Fire eventually got the smallest battery I could get — the 12-amp — because that’s the only thing that would fit the frame alongside everything else. It’s not elegant. It works.
The RockHopper, and the derailleur rabbit hole
The RockHopper had room for the battery. It did not have room for the battery and the controller, which is the recurring theme of this whole project: that controller box is too big for modern frames and screws on with cheap plastic hardware to a tube that’s the wrong size on every single bike. So I parked the controller in a saddle bag to test the bike while I waited on a proper bag to arrive.
Then I made my real mistake. The PAS sensor — the pedal-assist sensor that reads your cranking — wouldn’t seat properly on the right side, so I zip-tied it, which renders the small front chainring useless. Can’t keep a chain on it. Between that and the way the rear hub shifts the chain line, you have to add a spacer to keep the chain from rubbing, and that throws off the derailleur. I should have left it, set the bike up, ridden it, and tweaked at the very end. Instead I got ambitious and tried to fix the derailleur mid-build, which turned into hours and hours of misery. I looked up how to reset it. Nothing worked the way the internet promised. I eventually just got it to a place where it doesn’t rub, and now I limit which gears I use so the chain stays put. With pedal assist you don’t need the full range anyway, so I’ve made peace with riding inside a smaller window.
The La’nai, and the one good idea
Jennifer’s bike, the La’nai, is where I finally did something smart, mostly by accident. It turns out it has more mounting points on the frame than the others, and it’s the same size as the Mountain Fire, so I knew the in-frame battery wouldn’t fit. So I went with a rear-rack-mounted battery instead. That’s the solution I’d recommend to anyone: the battery lives over the back wheel, it leaves the frame triangle open, the bike keeps its water-bottle mount, and you can strap a small bag on top of the rack for the controller. Cleaner than anything I did to the other three. The catch is they sell you the smaller 12V battery but don’t tell you how to mount it — they just send you the battery and wish you luck — so I found a bag that fits under the frame and holds it. Wasn’t made for a battery. Fits great.
The hub that wasn’t broken
Here’s the one I’m contractually obligated to confess. On one of the installs the rear wheel wouldn’t spin freely — it was binding, dragging, clearly something wrong with the motor. I went back and forth with Varstrom’s support, which is in China, so it’s a time-difference, lost-in-translation, send-a-video, try-all-this kind of process. Meanwhile I ordered a backup kit off Amazon to swap in, figuring the hub was bad and I’d just return the dud.
The hub was not bad. After the kids took a test ride and immediately threw the chain off the back, I’d gone hunting for a dork disc — the plastic spoke guard that sits behind the cassette — and the one I jammed back there was a little too small and black enough that I didn’t clock it. It was binding the cassette. Bad user, not bad hub. Mistakes were made. And then, because I am nothing if not consistent, I did the same exact thing on another install before the lightbulb finally went on.
So what is it, after all that
A bike with one of these kits is no longer a bike. It’s an e-bike, full stop. You can ride it without the battery, but the controller’s still bolted on, the wiring’s still there, the rear wheel is heavier, and there’s no quick release to undo any of it. It’s wired, it’s permanent, it’s a commitment. We probably should have lived with one for a while before committing all four. We did not.
But — and this is the part that matters — the pedal assist is genuinely great. The way the rail trail flattens the grade is exactly the point. From our house to town it’s all gentle downhill, so coming home it’s all gentle uphill, and that’s the kind of consistent climb that wears kids down (kids who, these days, are not built to tolerate even mild discomfort no matter how hard we try to teach them otherwise). The assist erases that. My legs got tired on the way back; theirs don’t have to. I also learned, somewhere in the middle of all this, that the La’nai and the RockHopper have mechanical disc brakes — cable-actuated, not hydraulic — which I didn’t even know was a thing until I had to realign the rotors. Something about them seems more honest than hydraulics to me, but what do I know. I converted four bikes by hand and thought a spoke guard was a dead motor.
What I’d tell you before you start
Honestly, if you already know your way around a bike — cone wrenches in the drawer, cassette off and on in your sleep, tools staged before you start — this is a good weekend, not a hard one. The motor install is the easy part. The real work is the fitment decisions, and that’s where I’d point anyone thinking about it.
Start with the battery, because it dictates everything else. Before you buy, figure out whether an in-frame battery will actually clear the triangle with the controller — on three of my four bikes it wouldn’t. When it won’t, go rear-rack; it’s cleaner anyway. If you do mount in-frame, get a stronger bracket than the one included and don’t trust two little screws with a heavy pack.
The controller is the other headache. The box is oversized for modern frames and the included hardware is cheap plastic — at the very least, swap those screws for proper hex or torque bolts, and honestly, just buy a bag. The one that comes with the kit doesn’t seem to work well on much of anything.
The trickiest mechanical part is the rear cassette and wheel spacing. A bigger hub pushes the cassette toward the frame, so in your lowest gear the chain can rub. The kit gives you notched washers that seat into the dropout — I put those on the inside — and on a couple of bikes I had to add the thin extra washers they include to push things out just enough to keep the chain off the frame in that lowest gear. Then you’ll probably have to nudge the disc rotor or caliper so the wheel still rolls free. Expect to lose a couple of usable gears in back; one of the Konas came out with about six. ChatGPT gave me the wrong spacer spec, so I ended up eyeballing it, but there’s a spacer kit in the links below that did the job.
And the wiring is just going to be a mess up front — some cables too long, some too short, a pile of slack you tuck wherever it fits. Watch the red-and-black brake-light plug unless you enjoy the headlight coming on when you brake.
Would I recommend it? For us, yes — with a caveat about who “us” is. We’re casual riders on flat rail trails, not people hammering technical singletrack. For that kind of riding the payoff is real: longer day trips, excursions we can now ride to instead of loading bikes in the car to reach a trailhead, and an end to the kid-fatigue that used to kill a ride before it started. There’s also something that feels less wasteful about electrifying a bike I already owned than buying a second, dedicated e-bike and keeping two around.
Timeline, so you can set expectations: four bikes, started around the first of May, and it took me roughly a month of fits and starts — mostly because I kept discovering I needed one more part I didn’t have. If you’ve got the knowledge and the tools ready to go, it’ll move a lot faster than that. And fair warning, I still haven’t ridden all four enough to know exactly what each one needs dialed in.
What I actually bought
The kit itself, four times over:
- Varstrom 48V 500W Bafang rear-hub kit — varstrom.com/en-us/products/48v-500w-rear-hub-kit-bafang. Orders #VS6221, #VS6562, #VS6847, #VS6954, plus one backup kit ordered through Amazon.
Tools I didn’t own and had to go get:
- Bottom bracket / crank removal tool (Teyssor 20-tooth BB remover) — to pull the crank so the PAS sensor can slip on. amazon.com/dp/B09JJLMKF2
- Chain whip + cassette lockring removal kit (Oumers) — for getting the cassette on and off, which I did roughly three times per bike. amazon.com/dp/B075RS5T8P
- Bike repair/work stand (VEVOR, 110 lb) — because you will be standing the bike up over and over. amazon.com/dp/B0F7XF88KN
- Cassette / hub spacer washer kit — the spacers that fix the chain line so it stops rubbing. amazon.com/dp/B0GXVF1TR8
Torque arms (you need them — even at 500W, don’t strip the dropout):
- Grin Technologies V5 universal torque arm — the good one, for frames with threaded eyelets. amazon.com/dp/B0CCXKT228
- ECSiNG 6mm stainless torque arm (2-pack) — the simple teardrop style; cheap and it works. amazon.com/dp/B0FT9GMX7W
- Universal M14 torque arm kit (2 sets) — the budget option. amazon.com/dp/B0BN52MBB8
Battery and controller mounting (because the included hardware isn’t enough):
- DRIFT MANIAC aluminum battery frame mount — the stronger bottle-cage-pattern hold-down I’d recommend over the two-screw mount. amazon.com/dp/B0BRXRGT93
- TOSUOD under-tube frame bag — fit perfectly under the frame to hold a battery/controller. amazon.com/dp/B0FFGQ6Y2T
- EfforPrac waterproof controller bag — for parking the controller box when it won’t fit the frame. amazon.com/dp/B0H28Q2DHQ
- JOYSOG controller/battery hanging bag — same idea, different size. amazon.com/dp/B0CDFXHMHD
Throttle:
- LGEGE Bafang thumb throttle — a slip-over replacement for the included throttle, which only slides on and is a pain. amazon.com/dp/B0C84Q47SD
Frame protection (rubber tape under the pipe clamps so the clamps don’t chew the paint):
- Yhoetid adhesive neoprene strip, 1″ wide — amazon.com/dp/B0FPQK3NCN
- WochiTV adhesive neoprene strip, 1/2″ wide — amazon.com/dp/B0CLXMHPKR
And the camera gear for the video that became a blooper reel:
- GoPro/action-cam 1/4″-20 mount adapter — amazon.com/dp/B085X9DC1X
- Handlebar action-cam mount (KREMORV) — amazon.com/dp/B0BX4CG82X
- Seat/taillight action-cam bracket — amazon.com/dp/B0FP2X759H
Two more links from the pile I couldn’t pin down to a specific product — tell me what they were and I’ll slot them in: amazon.com/dp/B09WYYHCDQ and amazon.com/dp/B0FPLPNVYS. (My guess is a PAS sensor and/or a brake sensor, given where they fell in the saga, but I’m not going to claim that in print until you confirm.)
Grade: B+, maybe a B. The kits work, the assist is everything we wanted, and the kids actually ride now — which is the only metric that counts. Varstrom ships a genuinely good motor wrapped in vague instructions, a controller box that fits no modern frame, mounting hardware that isn’t up to the weight, and a throttle you’ll want to replace, so it’s not an A. But I learned a ton, and with any luck that knowledge sticks if I’m ever fool enough to do this again (odds: low). If you know bikes and have your tools staged, this is a good weekend. If you don’t, it’s about a month of fits and starts, a new toolset, and a humility you didn’t order — and I’d still tell you it was worth it.
Next up: living with four e-bikes that used to be bicycles — range, charging, and whether the rail trail forgives my derailleur.


Leave a Reply