
Or: How Warm Floors Can’t Save You From Bad HVAC Decisions
Winter 2009-2010
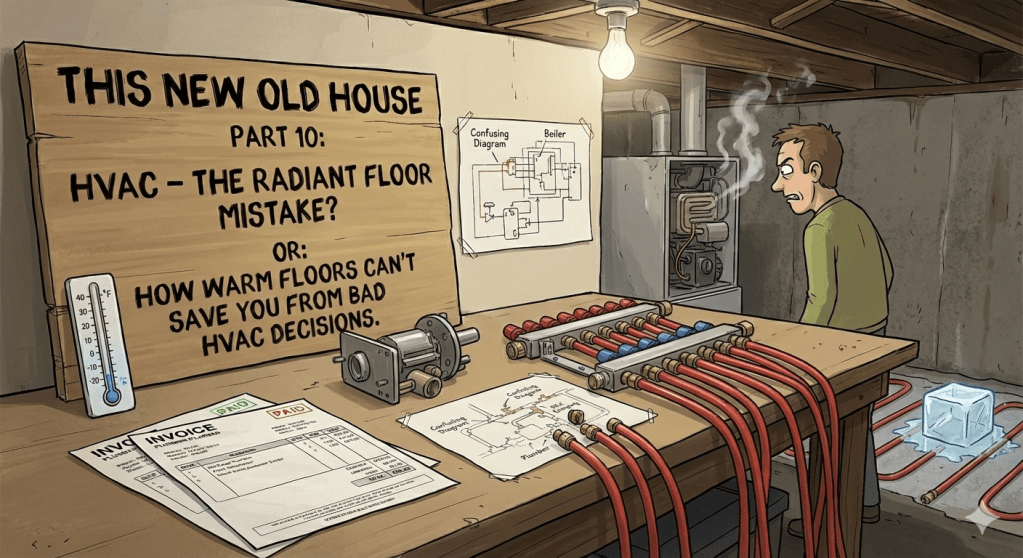
After the plumbing nightmares, it was time for HVAC. We installed radiant floor heating throughout the house—hot water running through tubes in the floors, heated by our Triangle Tube boiler.
It’s actually very nice to have warm floors in the winter. Walking barefoot on toasty floors is lovely.
But I still think European-style radiators would have been the way to go.
The Radiant Floor Reality
Radiant floor heating works by running hot water (hydronic fluid) through tubes embedded in your floors. The floor heats up, which radiates heat into the room.
The Good:
- Warm floors are pleasant
- Even heat distribution
- No visible radiators or baseboard
- Quiet operation
- Efficient when it’s working properly
The Bad:
- Doesn’t react quickly to temperature changes
- Thermal mass of the floor takes hours to heat up or cool down
- Can’t adjust room-by-room easily
- Need supplemental heating for quick temperature changes
- Repairs require accessing under floors
The slow reaction time is the killer. If you wake up cold and turn up the thermostat, you’re waiting hours for the floor mass to heat up. Coming home to a cold house? You’re not getting warm quickly.
That’s why we needed supplemental air heat.
The Central Air System (That We Needed Because of Radiant)
We installed central air with a blower that had a hydro coil for hot air heat. This was required because the radiant floor heating alone couldn’t provide quick heat response.
The hydro coil connected to our boiler system and could heat air quickly when needed.
But air heat is super inefficient.
Air heats quickly but cools quickly. It’s not radiant heating that keeps warming. You heat the air, the air cools, you heat it again. Constant cycling.
Plus we added air conditioning for summer, which meant ductwork throughout the house, blower in the attic, outdoor compressor—a whole separate system.
What European Radiators Would Have Been
European-style radiators are individual wall-mounted or baseboard radiators with their own thermostats on each unit.
How they work:
- Each radiator has its own thermostat
- You set the temperature you want in each room individually
- Hot water from the boiler circulates to the radiators
- Each radiator heats only when its room needs heat
- Much faster response time than radiant floors
- Room-by-room temperature control
Why this would have been better:
- No need for supplemental air system
- No central air ductwork needed (could still add AC if wanted)
- Faster heat response
- Individual room control
- Easy to repair or replace individual radiators
- More efficient overall system
I was also curious about using hydro to cool in the summer. Apparently you can run cold water through radiant systems for cooling. But we didn’t explore that option.
Looking back, radiators with individual thermostats would have been more practical, more efficient, and wouldn’t have required the entire central air system for supplemental heat.
The Air Handler Location Disaster
When planning the HVAC, I asked that the air handler be put in the basement for easy access and repairs.
“That’s inefficient,” they told me. “It has to go in the attic.”
I was told something about cold air dropping, heat rising—the attic location was supposedly necessary for efficiency.
I think I should have pushed for the basement.
The attic location has been a nightmare for repairs and maintenance:
- Limited access (small access hole initially)
- Hot attic in summer (not pleasant for repairs)
- Difficult to get equipment in and out
- Had to cut larger access panel myself later
Basement would have really simplified repairs and replacement. Everything would be accessible. Room to work. No crawling in hot attic spaces.
But they built the air handler into the wall in the attic with a small access hole.
The HRV We Needed (Because Spray Foam = Tight House)
Because we used spray foam insulation, we had a very tight house. This is good for energy efficiency. This is bad for air quality and humidity control.
In a tight house, you need mechanical ventilation. You can’t rely on air leakage to provide fresh air exchange.
Enter: the HRV (Heat Recovery Ventilator).
An HRV brings in fresh air from outside while exhausting stale indoor air. It recovers heat from the outgoing air to pre-warm the incoming air (or pre-cool in summer). This maintains air quality without completely losing your heating/cooling efficiency.
The problem: The HVAC contractor undersized the unit for our house.
We had to run the HRV 24/7 just to try to manage humidity and air quality.
Even that didn’t solve our humidity issues—mostly because of the shoddy Pella windows (more on those in Part 11). The windows constantly had moisture buildup, mold growth, and condensation problems.
Sixteen years later, I don’t use the HRV anymore.
Instead, I use a dehumidifier and bathroom fans. I do the German “burp method” of fresh air—opening windows periodically to exchange air.
This is not ideal. This is not what you’re supposed to do with a tight, modern house. But the undersized HRV couldn’t keep up, and dealing with the Pella window moisture was a losing battle anyway.
Lesson: Make sure your HRV in a modern tight build can handle moving enough air for your house size. Don’t let the contractor undersize it to save money.
And of course, have good windows. (We did not have good windows. See Part 11 for that disaster.)
The Access Panel I Had to Create
When they had to replace the hydro coil after 5 years (more on that in a moment), I realized the access hole was too small to actually get the air handler out for replacement.
I ended up cutting a large access panel myself. Made sure it was large enough to get the air handler out for when—not if—it needed to be replaced.
Lesson: Plan access for equipment replacement, not just for routine maintenance. The people installing it won’t think about how to remove it later.
The 5-Year Coil Failure
The coil on the AC needed to be replaced after 5 years.
Five. Years.
We built a new house so we wouldn’t have to repair anything. And here we were, 5 years in, replacing major HVAC components.
I asked the technician about this.
“All of that equipment is only built to last 5-10 years,” he said casually.
WHAT THE FUCK?
This is when it hit me: a renovation would have been a better approach.
If you have to replace everything anyway, just wait until it breaks. At least with a renovation, you’re not starting with the repair clock at zero.
We paid for all-new HVAC. We got 5 years before major repairs started.
If we’d bought a house with 10-year-old HVAC, we’d have gotten 5 years before needing repairs and saved tens of thousands on the initial install.
The math didn’t make sense anymore.
The Leaky Valve and Emergency Service Hours
After the coil replacement, we had another issue—a leaky valve.
The company that replaced the coil didn’t have the equipment to properly check the system.
I had to switch companies. Again.
The new company advertised “emergency service.”
Emergency service during working hours only.
I asked them about this. Apparently “emergency” means “we’ll try to get there same day if you call during business hours.”
That’s not emergency service. That’s regular service with urgency.
But this was the recurring theme with HVAC companies. Everyone had their own definition of “emergency,” and none of them matched mine.
What They Got Wrong During Installation
Looking back at the HVAC installation, there were several problems that haunt us now:
1. The Wire to the Outdoor Unit
The wire run to the outdoor AC unit was only a cooling wire. It would not allow for future upgrades to a heat pump.
When heat pump technology improved and we wanted to upgrade, the wiring couldn’t support it. Would have needed to run new wire.
Should have been: Run wire capable of handling heat pump from day one, even if just installing AC.
2. The Crimped Supply Line
When installing the outdoor condenser, they put a crimp in the refrigerant supply line that could have interfered with cooling.
I didn’t notice this until we were having problems with the AC. The crimp was restricting flow.
Should have been: Proper bend radius on refrigerant lines, no kinks or crimps.
3. Vibration from Coolant Pipes
There was vibration from the coolant pipes that ran up to the blower in the attic. The vibration was audible in the house and annoying.
Eventually had to add vibration dampening, which should have been part of the original install.
4. Emergency Drain Pan Not Sloped Properly
The emergency drain pan under the air handler was not installed at the proper slope/grade.
Over the years, it started rusting out. Rust stains ran down the side of the house where the condensate drained outside.
This should have been a simple detail—slope the pan correctly so water drains. But apparently simple details don’t matter when you’re rushing through an install.
5. Coolant Pipes and Wires in Outside Wall
They buried the coolant pipes and wires in the outside wall running up to the attic.
Why this is stupid:
When you replace your AC unit and blower, they want to run new pipes. They can’t easily run them through the finished wall, so they just run them on the exterior and cover with plastic conduit.
It ends up looking horrible.
The pipes and wires should have been run inside an interior wall up to the attic. Then replacement would be hidden and cleaner.
I’m not sure if they could have done this with our layout, but looking at it now, there had to be a better solution than exterior plastic conduit.
The Things I Wish I’d Known
About radiant floor heating:
- Supplemental air heat would be required
- European radiators would have been more efficient
- Individual room thermostats give better control
- Hydro cooling is an option (didn’t explore it)
About HVAC equipment:
- “Built to last 5-10 years” is apparently acceptable
- New equipment ≠ no repairs for 15+ years
- Access for replacement is different than access for maintenance
- Basement location would have been better than attic
About installation:
- Wire for heat pump capability even if just installing AC
- Check refrigerant line bends for kinks
- Slope drain pans properly
- Add vibration dampening to pipes
- Run pipes/wires in interior walls when possible
- Cut proper access panels from the start
What We Got Right
- Radiant floor heating is pleasant (even if not most efficient)
- Boiler system worked (when not dealing with glycol issues)
- Eventually got proper access panel cut
- Learned what not to do for future HVAC work
What We Got Wrong
- Should have done European radiators instead of radiant floors
- Air handler in attic instead of basement
- Inadequate access panel (had to cut my own)
- Wire to outdoor unit not heat pump capable
- Crimped refrigerant line
- Pipes in outside wall instead of inside
- Didn’t slope drain pan properly
- No vibration dampening on pipes
- Expected new equipment to last longer than 5 years
- **HRV undersized for house (couldn’t keep up with humidity/air exchange)**
- **Pella windows made HRV struggles worse (constant moisture issues)**
The Long-Term Verdict
Fifteen years later, we’ve replaced the coil, fixed the valve, dealt with vibrations, patched rust stains, and learned that HVAC equipment is apparently disposable with a 5-10 year lifespan.
The radiant floors are still nice. The house stays warm (or cool). The systems work.
But European radiators would have been more efficient, more controllable, and wouldn’t have required the supplemental air system.
And if I could do it over, the air handler would absolutely go in the basement, not the attic.
I’ll do a separate post about replacing the Triangle Tube and HVAC units eventually. That’s its own adventure.
__________________________________________________
Next up: Part 11 – Pella Windows: The Review I Should Have Posted 14 Years Ago
(Already written – the comprehensive disaster review of our biggest regret)
__________________________________________________
Quick Takeaways
Radiant Floor vs. Radiators:
✅ RADIANT FLOOR PROS:
- Warm floors are pleasant
- Even heat distribution
- No visible equipment
- Quiet
❌ RADIANT FLOOR CONS:
- Slow to react (hours to heat up)
- Can’t adjust quickly
- Need supplemental air heat
- Repairs difficult (under floors)
✅ EUROPEAN RADIATORS WOULD HAVE BEEN BETTER:
- Individual thermostats per radiator
- Room-by-room temperature control
- Fast response time
- Easy to repair/replace
- More efficient overall
- No need for supplemental air system
Air Handler Location:
❌ ATTIC (What We Did):
- Difficult access
- Hot in summer for repairs
- Hard to get equipment in/out
- Small access holes inadequate
✅ BASEMENT (What We Should Have Done):
- Easy access
- Comfortable working conditions
- Room for equipment removal
- Simpler repairs and replacement
HVAC Equipment Lifespan:
Reality: 5-10 years is considered normal
- Coils fail
- Compressors fail
- Blowers fail
- “Built to last” apparently means 5-10 years
The Renovation vs. New Build Math:
- New HVAC: $15,000-25,000
- Lifespan: 5-10 years until major repairs
- Old HVAC in renovation: Already 10 years old
- Same 5-10 year window, $20,000 saved
Installation Mistakes to Avoid:
❌ DON’T:
- Wire only for current equipment (wire for heat pump capability)
- Crimp or kink refrigerant lines
- Install drain pans without proper slope
- Forget vibration dampening
- Run pipes/wires in outside walls
- Cut inadequate access panels
✅ DO:
- Wire for future upgrades
- Proper bend radius on all lines
- Slope drain pans for drainage
- Add vibration dampening from start
- Run pipes/wires in interior walls
- Cut access panels large enough for equipment removal
European Radiator Systems:
- Individual radiators with own thermostats
- Set desired temperature per room
- Hot water circulates from boiler
- Each radiator heats independently
- Room-by-room control
- Faster response than radiant floors
- Easier maintenance
Hydro Cooling:
- Can run cold water through radiant systems
- We didn’t explore this option
- Would have been interesting alternative to AC
HRV (Heat Recovery Ventilator):
✅ CRITICAL FOR TIGHT HOUSES:
- Spray foam = tight house
- Need mechanical ventilation
- HRV provides fresh air exchange
- Recovers heat from outgoing air
❌ OURS WAS UNDERSIZED:
- Contractor undersized to save money
- Couldn’t keep up with air exchange needs
- Had to run 24/7
- Still couldn’t manage humidity (Pella windows made it worse)
- Eventually stopped using it (use dehumidifier + German burp method instead)
✅ DO THIS:
- Size HRV properly for house volume
- Don’t let contractor undersize
- Have good windows (not Pella)
- Plan for adequate air exchange in tight builds
Budget Reality:
- Radiant floor install: $10,000-15,000
- European radiators would have been: ~$8,000-12,000
- Central air system (needed for radiant): +$12,000-18,000
- HRV (undersized): $2,000-3,000
- Properly sized HRV would have been: +$500-1,000
- Coil replacement after 5 years: $1,500-2,500
- Access panel cutting (DIY): $50 in materials
- Vibration dampening (should have been included): $200-400
- Dehumidifier to compensate for failed HRV/windows: $200-400
- Future HVAC replacement: $15,000-25,000 every 10 years
What Actually Matters:
The house heats and cools. The radiant floors are pleasant. The systems work.
But the reality is slower response times, need for supplemental heating, and efficiency that doesn’t match European radiators with individual thermostats—even if having warm floors is wonderful.
And discovering that HVAC equipment is designed to last 5-10 years fundamentally changed my view on the value of new construction vs. renovation.
Our Grade: C
Systems work but inefficient design. Radiant floors are nice but required supplemental air. Poor access planning. Equipment failures after 5 years. Installation mistakes (crimps, slopes, wire capacity). Attic location complicates everything.
The warm floors are the only thing that saves this from a D.
Final Thought:
Radiant floor heating sounds amazing. Warm floors! Even heat! Efficient!
But the reality is slower response times, need for supplemental heating, and efficiency that doesn’t match European radiators with individual thermostats.
And discovering that brand-new HVAC equipment is designed to last 5-10 years before major repairs makes you question the whole value proposition of new construction.
If it’s all going to break anyway, maybe start with old equipment that’s already 10 years into its lifecycle. At least you’re not paying premium prices for a 5-year warranty.
Also: put the air handler in the basement, not the attic. Future you will thank you when it needs repair or replacement.
And definitely wire for heat pump capability even if you’re just installing AC. Technology improves faster than HVAC equipment fails.

Leave a comment