
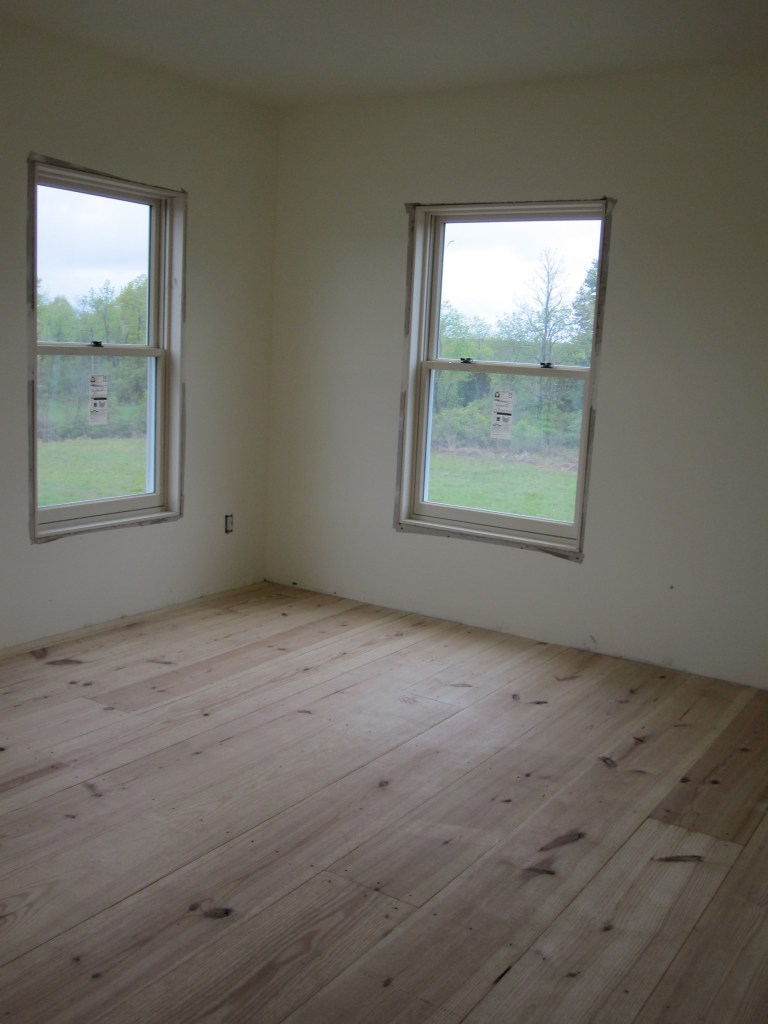
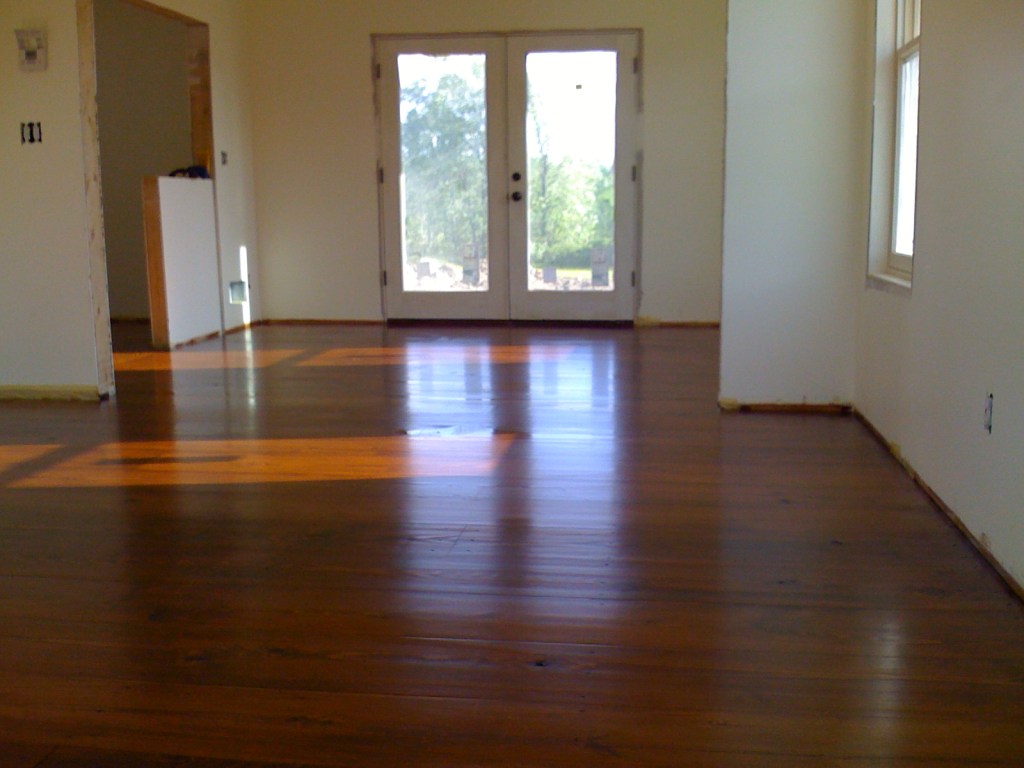
After painting came flooring. And I had a very specific vision: wide plank flooring with exposed face nails, just like colonial homes from the 1700s. Old growth wood with character. Reclaimed if possible. The authentic historical look.
The Connor Homes kit included flooring as an option. It was beautiful — I think it was reclaimed wide plank. It was also obscenely expensive.
So I went searching for an alternative that would give us the old house aesthetic without the old house price tag.
The Heart Pine Discovery
Through extensive internet research and calling around for samples, I discovered Heart Pine flooring. Heart Pine is cut from the heartwood of old-growth pine trees and is significantly harder than regular white pine. It’s not as hard as oak or other hardwoods, but it’s a middle ground — harder than soft pine, cheaper than hardwood, with the wide plank aesthetic we wanted.
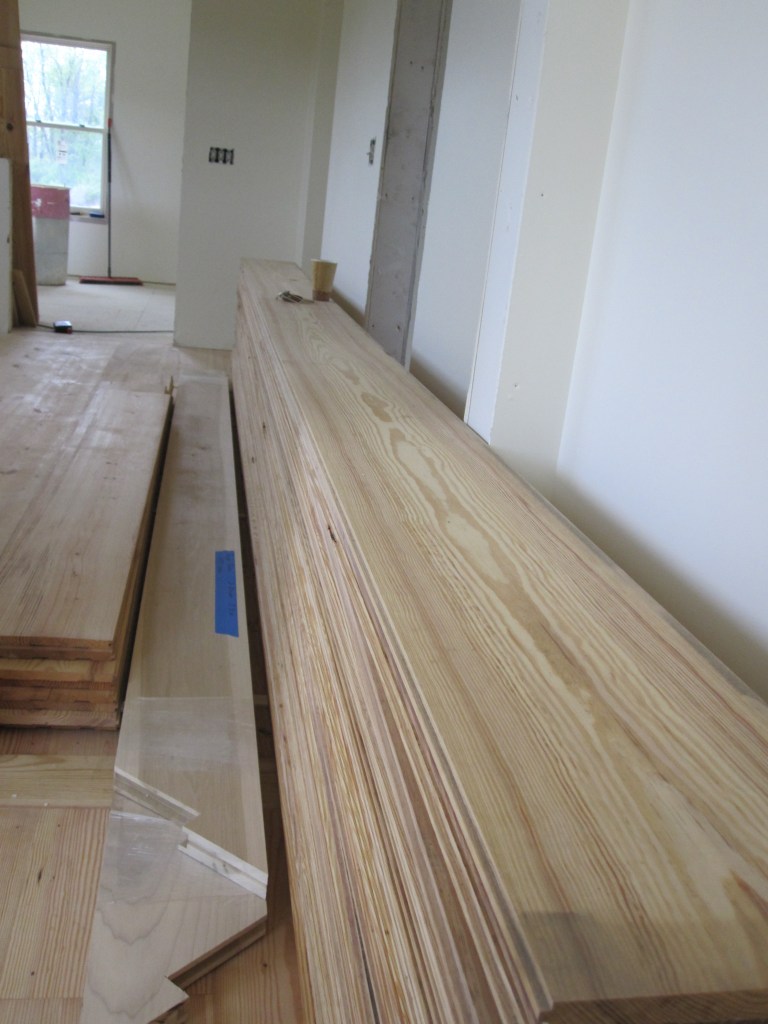
I contacted multiple companies, compared samples, and eventually settled on Timeless Wood Floors out of Villa Rica, Georgia. We ordered 12-inch wide Heart Pine boards, 3/4-inch thick, cottage grade (knots and character; clear grade was way out of budget). About $12,000 for the whole house.
The company brought it up themselves on a trailer and delivered it to our house. We stored it in the basement until we were ready to install.
This would turn out to be a mistake for reasons I’ll get to.
The Finish Formula
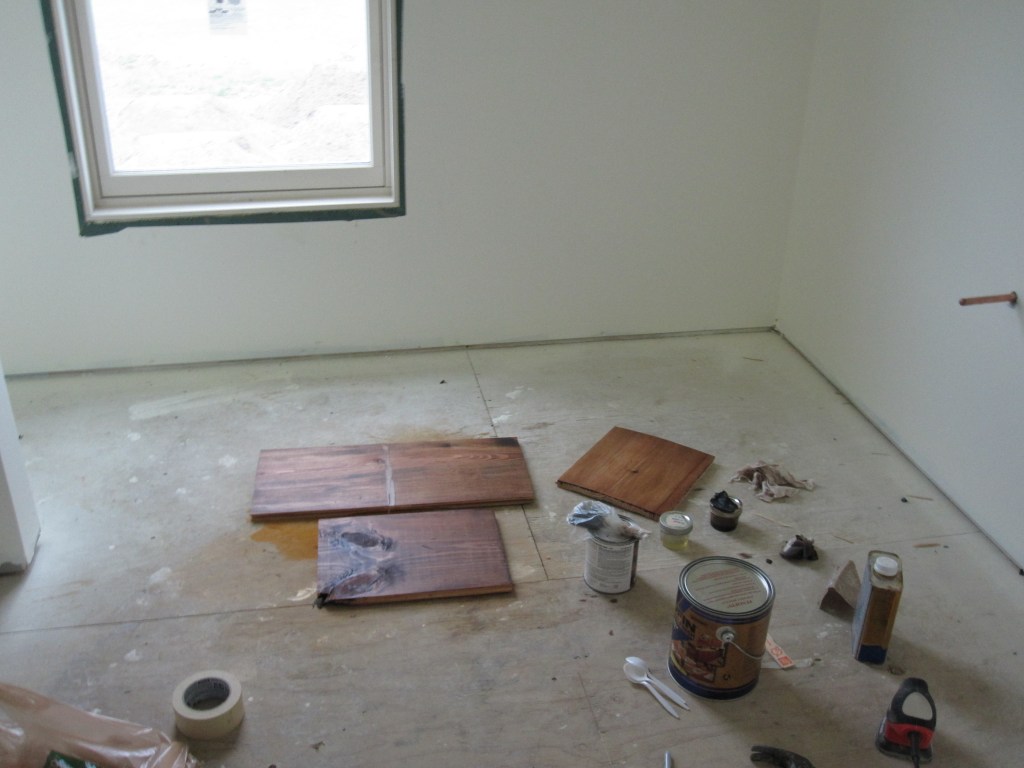
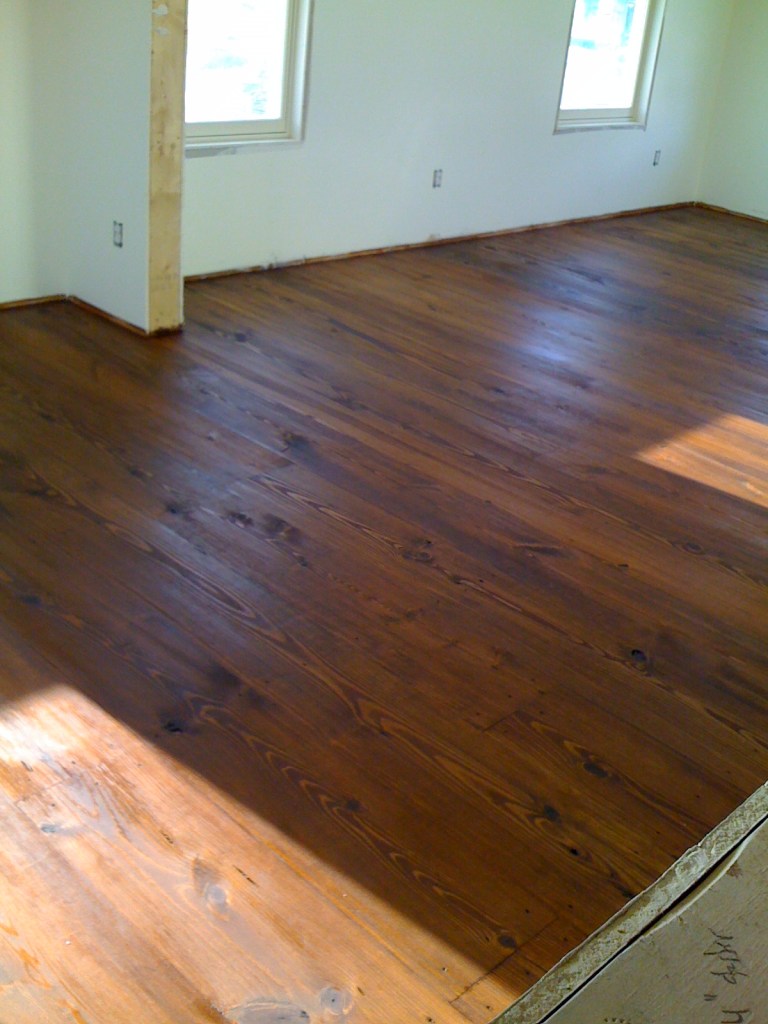
Jennifer and I wanted a dark, aged wood look. Not the light natural pine color. We wanted it to look like 200-year-old floorboards that had darkened and warmed over time.
Simple, right? Just buy some stain and apply it.
Wrong.
I tried various stains from the big box stores — MinWax and others. Too light. Too orange. Too something. Nothing looked right. Then I found Penofin. The walnut color was close, but too dark applied directly to raw wood — it would over-saturate and black out the grain.
So I developed a multi-step process that I’m sure professional floor finishers would laugh at:
- Real Milk Paint Company’s natural tung oil, thinned with citrus solvent to penetrate the wood. This sealed it slightly so the stain wouldn’t over-penetrate.
- Penofin in Mahogany over the tung oil base. Warm dark color, grain still visible.
- Waterlox Original Satin Finish. Two coats. Light sanding between.
Waterlox Original is not VOC compliant. I ordered it in quarts — 32 or more for the whole house. It’s a solvent-based finish that off-gasses like crazy and is about as toxic as you can get while still being legal to sell. But it gives a beautiful, warm, durable finish. I didn’t know about the non-toxic version at the time. I just knew the Original was what people recommended for high-quality floors.
For the historical look, we ordered Tremont Steel Cut Nails from Tremont Nail Company in Mansfield, Massachusetts. Reproduction nails made the old-fashioned way, tapered square profile. We couldn’t drive them too deep because we only had 3/4-inch boards over 3/4-inch plywood, and beneath that was the radiant floor heating. Go too deep and we’d puncture the radiant tubing. So the nails were short, decorative, spaced 2-3 feet apart, three across the width of each board.
The Moisture Problem, Again
Remember how I mentioned we stored the flooring in the basement while the house was being finished? The basement where we were also storing the trim that was absorbing moisture? The basement in the house that was saturated from spray foam curing, drywall mud drying, and paint off-gassing?
Yeah. The flooring absorbed moisture.
I checked it with a moisture meter before installation. The reading seemed impossibly high. I thought the meter must be wrong.
The meter was not wrong. I was wrong.
But we were on a schedule, and I convinced myself it would be fine. The wood would acclimate. It would dry out once installed. This assumption would come back to haunt me.
The Installation
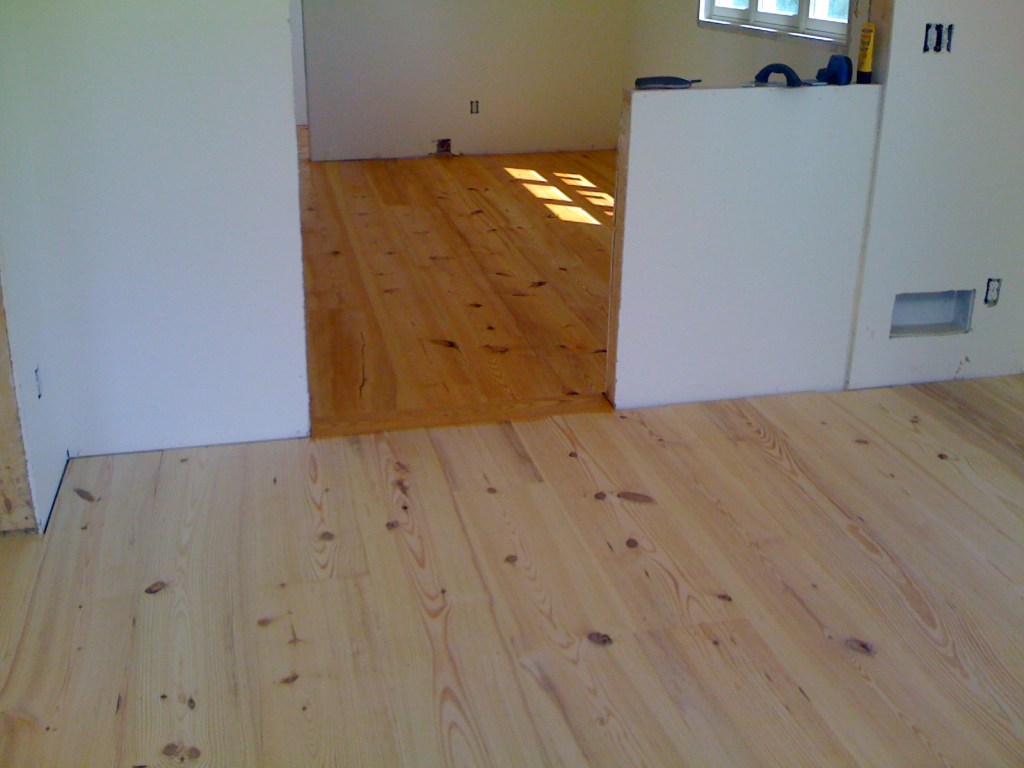
My friend and his nephew handled the installation. They glued the boards down and then face-nailed them with the Tremont nails.
Heart Pine splits easily. Really easily. Every nail hole had to be pre-drilled or the board would crack. This turned a straightforward nailing job into a massive undertaking — pre-drill hundreds of holes, then nail them by hand.
We did the entire house in Heart Pine: living room, dining room, kitchen, bedrooms, hallways, bathrooms. Everything. The logic: older houses used wood floors everywhere. It would look consistent. It would be simpler than switching materials for different rooms.
We probably should have tiled the bathrooms. With kids, bathrooms get flooded. Wood floors in bathrooms are not ideal. But at the time, it seemed like the authentic choice.
The Nail-Tapping Nightmare
After the floor was installed, I hired a professional floor sander to come sand it smooth and prep it for finishing.
He looked at the floor and said, “You might want to tap those nails down. Otherwise, when I sand over them, you’re going to have shiny metal spots all over your floor.”
I had hundreds — maybe thousands — of nails in the floor. All of them needed to be tapped down slightly below the surface using a nail punch and hammer. Take the punch. Position it on the nail head. Swing the hammer with enough force to drive the nail down about 1/16 of an inch. Repeat. For every. Single. Nail. In the entire house.
I developed literal PTSD from this process. I would swing the hammer, miss the punch, and smash my finger. Over and over and over. I don’t know how I didn’t break a finger. I must have hit myself hundreds of times.
I started to fear swinging the hammer. I’d hesitate, which made it worse. I’d get tired, which made my aim worse. More smashed fingers.
I tapped some nails too far and created divots in the wood. I missed some nails entirely. Ironically, the ones I missed looked better because they still sat slightly proud and caught the light, which was the original aesthetic anyway.
But I was committed to the process, so I tapped them all down. Every last one. With my increasingly bruised and swollen fingers.
The Finishing Process
After the professional sanded the floor, it was my job to apply all the finish coats.
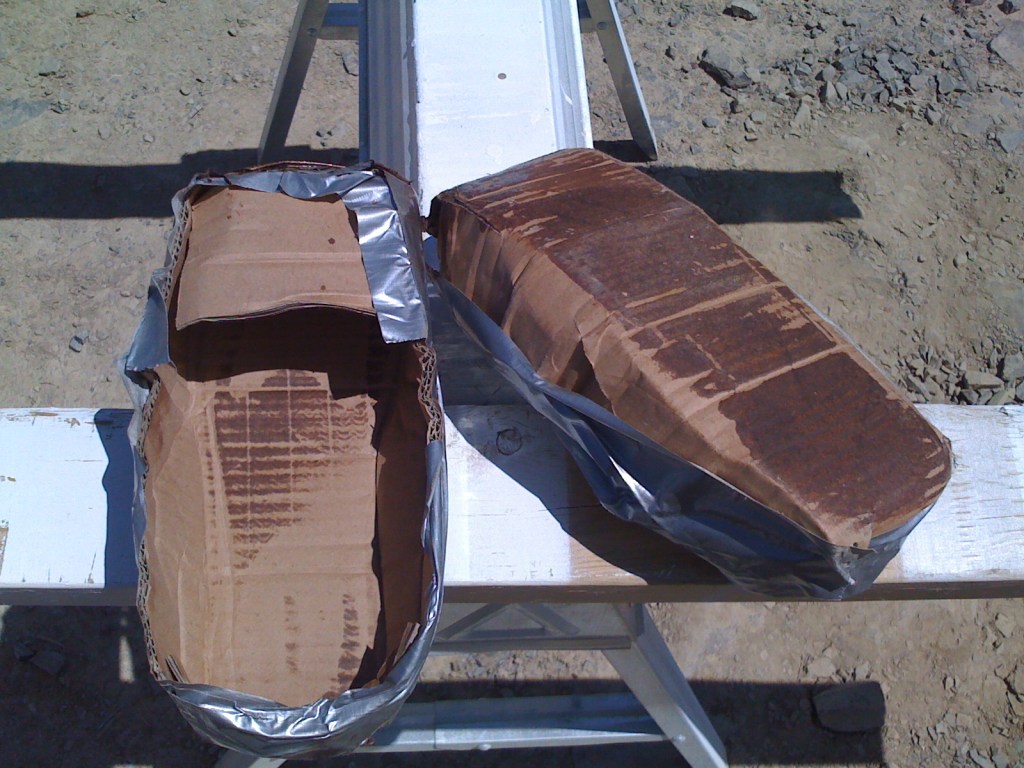
The tung oil wasn’t too bad. The citrus solvent made it smell like oranges. I could have the windows open. I made special cardboard shoes so I could walk on the wet finish without leaving footprints. This mostly worked. Except when I left a can of thinner sitting on the floor and it left a small ring that darkened when the stain went on. And a spot where I stepped in solvent that also darkened. These imperfections are permanent and only I notice them, but they’re there.
The Penofin stain went on next — one coat, maybe two, I don’t remember. This is where the color started to really develop.
Then the Waterlox. This is where things got really unpleasant. Even with all the windows open, fans running, and wearing a respirator, I would get headaches. The fumes permeated everything. The house reeked of solvent. You apply two coats and sand lightly between them. Each coat takes time to dry. The whole process took days. I may have taken a week off work to finish this. Or worked from home while the house was uninhabitable. I honestly don’t remember. I just remember the toxic haze.
All the rags I used with the solvent-based products were potential fire hazards — they can spontaneously combust if left in a pile. So I’d spread them out in the yard to dry before disposing of them. This added paranoia to the already unpleasant experience of poisoning myself with floor finish.
The Variations
I used polyurethane instead of Waterlox in the bathrooms and laundry room because I thought it would be more waterproof. I’m not sure that was correct, but that’s what I did. We’ve had some issues where water sits — like by the fridge where the kids drop ice constantly — and it does something to the finish. But it’s not catastrophic.
When we eventually put flooring in the attic, we used regular 6-inch pine (not Heart Pine) and painted it white with Benjamin Moore porch paint. I rolled the paint on. The roller texture didn’t flatten out. It stayed in the finish. Forever. I should have brushed it, or used a much finer nap roller. The textured finish bugs me every time I see it.
For the stairs, I somehow miscounted the treads we needed. We’d ordered clear grade (no knots) to make them look nicer, but we were one or two treads short. I had to go to a big box store and buy pine treads to match. They weren’t Heart Pine, but with the same staining process, they matched fairly well.
The Problems, Fifteen Years Later
The wide boards shrank. In some spots, gaps opened up — maybe 1/8 inch in places. Not everywhere, but noticeable. This is what happens when you install wood that hasn’t dried properly. The wood continues to dry after installation and shrinks. When I eventually refinish the floor, I can use Dr. Schutz Xtra Fill (a German product) mixed with sawdust from the floor to fill these gaps. It accepts stain and won’t crack out like regular wood filler.
A few years after we moved in, we had kids. We bought them a trike from Amazon — foldable, inline-skate wheels, what I thought would be perfect: quiet, smooth, good for riding around the house. We had specifically built the house with a loop so kids could run or ride in circles, just like I did growing up.
What I didn’t realize: the wheels on this trike were too hard. Way too hard. Our son rode around and around and around the loop. Hundreds of times. And the hard wheels left tiny ridges in the Heart Pine. Little lines everywhere. By the time I noticed, the damage was done. I researched tire compounds, found softer wheels, swapped them out. The new wheels didn’t make lines. But the old lines are still there.
One day I needed to pull out the refrigerator to access something behind it. The fridge was empty when I first installed it, so it slid easily. This time, it was full. It was heavy. And I didn’t put protection under it. I pulled the fridge forward and it left permanent grooves in the Heart Pine. Now, whenever I need to move the fridge, I have to put down thin sheets of Masonite or plywood first. Lesson learned the hard way.
Heart Pine is also somewhat fragile. In several spots, the wood split or cracked — probably due to the moisture content when it was installed combined with uneven drying. I had to glue some pieces back down. Not a huge problem, but it’s there.
And the dark finish we chose looks great. It has that aged, warm, dark tone we wanted. But it shows every speck of dust. Every footprint. Every particle of anything. In hindsight, we probably should have gone with a lighter honey color. It would have been more forgiving for daily living.
Heart Pine is harder than regular pine, but it’s still soft compared to oak or maple. It gets dents. It gets scratches. It gets lines from furniture, from hard wheels, from dropping things. After fifteen years of living on it, the floor has character. Lots of character. Maybe too much character. But it also feels authentic to an old house. A 200-year-old house wouldn’t have perfect floors. They’d be worn, dented, scratched, and full of history. Our floors just achieved that state faster than expected.
The Current State
We haven’t refinished the floors. The trike lines, divots, scratches, and gaps are all still there. The finish has worn in some high-traffic areas.
But honestly? The imperfections give it character. The floors look lived-in. They look old. They fit the house aesthetic we were going for.
Only I notice most of the flaws because I’m the one who created them. Jennifer doesn’t notice. Guests certainly don’t notice. They just see beautiful wide plank floors with old-style nails.
When we do eventually refinish them — and we will, someday — I’ll use Dr. Schutz Xtra Fill mixed with sawdust to fill the gaps and divots. I’ll probably go with a lighter stain color. And I’ll use a less toxic finish product.
But for now, we’re living with floors that look like they’ve been here for 200 years instead of 15.
Mission accomplished, I guess?
Grade: B-. The wide-plank Heart Pine floors look exactly like the colonial-era vision we started with — twelve-inch boards, Tremont cut nails, warm dark finish, knots and grain and character. They cost about $12,000 from Timeless Wood Floors in Villa Rica, Georgia, plus months of weekends and enough Waterlox Original to permanently fume out the house. We stored the wood in a damp basement before installation. It absorbed moisture. It shrank after we installed it. Gaps opened up between boards. Then our son spent his first few years circling the house on a trike with too-hard wheels and etched tire lines into the soft pine. The nail-tapping took a hammer to my fingers hundreds of times. The dark finish shows every speck of dust. The fridge left grooves. The attic paint stayed textured because I rolled it instead of brushing it. And the floors look beautiful. They look like they’ve been in the house for two hundred years instead of fifteen. Only I notice the flaws. Jennifer doesn’t. Guests don’t. And I still have all my fingers.
Next up: Part 16 — Chim Chimney.

Leave a comment